


13 Steps to getting your new pool running
Step 1
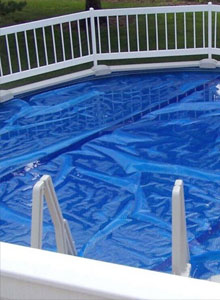
Fill pool to proper level. Stop adding water when the level in the pool reaches approximately 1/2 -2/3 up on the skimmer opening.

Step 2
Our pump strainer housing is the section of the pump that houses a basket with a clear lid. The hose that carries water from the skimmer to the pump connects to this housing, as shown in the illustrations. The strainer housing should be primed (filled with water no air) simply by gravity, if the equipment sits lower than the water level. Be sure to remove any plugs that might have been installed in the skimmer or return inlet and to OPEN any valves (optional) at the suction side and discharge to allow the water to fill the strainer housing. When you remove the pump lid, the housing should be filled with water. See Pump and Motor section for more details.
Step 3
Prior to filter start-up you should first be sure the filter drain plug is CLOSED, the air relief is OPEN, the locking ring on your filter is secure and the pump is primed.

Step 4
Plug the pump and motor into a GFCI protected electrical outlet. See Electrical Safety section for more information.
Step 5
If your pump and motor does not have a timer, simply plugging the motor in will turn it “ON”. If your pump and motor is equipped with a built-in timer, you can follow the directions on the motor to set the run times. Initially, we recommend the 24 hour, Setting 1, to allow the water to circulate and establish the proper chemical levels in your pool. Once set, turn switch from Off to the RUN position. After the first 4 days of operation you may reprogram the pump to Setting 3, for a 12 hour run time.
Step 6
As the water begins to circulate through the pump and filter any air trapped in the system will automatically vent to the pool and out the open air relief valve. Close air relief valve as soon as you see a steady stream of water. Make a note of the reading on the filter’s pressure gauge. This will be referred to as the “normal starting pressure”. This will be referred to as the “normal starting pressure”. When the reading increases 8 psi-10 psi above the normal reading you should backwash or clean the filter. Refer to the Filter Section of the Pool Manual for detailed information. If your pool is equipped with a Diatomaceous Earth or D.E. filter, you need to charge the filter with D.E. , see the D.E. Filter Section for more information.
Step 7
Once water is circulating, inspect the hose fittings, clamps and connections for leaks. A minor drip here and there is normal and can usually be stopped by simply hand tightening.
Step 8
If you suspect excess minerals or any metals may be present from the source water used to fill your pool, we suggest using an initial dosage of Nature’s Way Scale & Iron Control. Treat PRIOR to adding any chlorine to the water.
Step 9
Add Nature’s Way Stabilizer from your Start-Up Kit by broadcasting over the surface of the pool. DO NOT backwash for 3 days. Un-dissolved granules will NOT damage the liner.
Step 10
Test pH and Total Alkalinity of the water using your Test Strips. Following the directions on the bottle, test for the pH and Total Alkalinity readings. Proper ranges for pH are 7.2 to 7.6 and Total Alkalinity 80-120 ppm. If either test yields a low or high result- you should adjust by adding a Nature’s Way Increaser or Decreaser as needed. You can refer to the Water Balance section of the Pool Manual for more information and also receive detailed chemical recommendations from the water analysis- go to Main Menu, Test Water. The pH and Total Alkalinity must be within the proper ranges before proceeding.
Step 11
If your pool is equipped with a Nature² Mineral Sanitizer System, A Vessel or Pro-A Plus, follow the instructions below. Otherwise, proceed to Step 12.
A-Vessel Instructions:
- Shut off your pool’s pump and filter.
- Close any valves between the filter and pool or plug skimmer and return, so water does not drain out.
- Unscrew the housing cap (A) by twisting the cap counterclockwise until the cap is free of the housing base. If the cap is hard to twist, use a long-shafted screwdriver as a twist handle, placing it in the slot at the top of the housing cap.
- Insert your Nature² Mineral cartridge.
- Set cap in place and screw clockwise until it is snug. Do not over tighten.
- Open any valves that you closed, or unplug skimmer and return and turn pump on.

To activate your Nature² Cartridge you MUST maintain a Free Chlorine reading of 1-2 ppm with the filter circulating continuously for 24 hours for the first four days of operation. Shock the pool, as described in Step 12 and fill your floating dispenser or automatic chlorinator with the Nature’s Way chlorine tablets provided in your Start-Up Kit. At the end of the four days, you can reduce the chlorine output, by adjusting the output on your dispenser or chlorinator, to maintain a 0.5 to 1.0 ppm Free Chlorine reading. See the Nature² section for more information.
Pro-A-Plus Instructions:
- Shut off your pool’s pump and filter.
- Close any valves between the filter and pool or plug skimmer and return, so water does not drain out.
- Unlock locking ring C.
- Remove the Nature² Vessel Cap A
- Install the install the Nature² Mineral Cartridge into the Nature² cartridge chamber D.
- Re-install cap A and locking ring C.
- Set the Monthly indicator ring B as a reminder to replace the Nature² cartridge with a new A30 cartridge atThe Great Escape in 6 months.
- Install your Nature’s Way Z-Pack Chlorine Cartridge by removing the Chlorine Locking Ring G.and the Chlorine Dispenser cap F.
- Insert the Z-Pack cartridge into Chlorine Dispenser I.
- Reinstall cap F and locking ring G.
- Open any valves that you closed, or unplug skimmer and return and turn pump on.

In order to activate your Nature² Mineral Cartridge you MUST maintain a Free Chlorine reading of 1-2 ppm with the filter circulating continuously for 24 hours, for the first four days of operation. Shock the pool, as described in Step 12 and turn the chlorine output setting to HIGH. After the 4 day start-up you can adjust the chlorine dial to a lower output setting and allow the Free Chlorine level to drop to a 0.5 to 1.0 ppm reading. See the Nature² section for more information.
Step 12
Shock the water using the Nature’s Way Super Shock included in your Nature’s Way Start- Up Kit, to kill bacteria, viruses and algae. Broadcast the contents of the bag(s) over the surface of the pool, with the pump and motor on and water circulating.
Step 13
You are now ready to begin routine chlorination, using Nature’s Way Small Chlorinating or Blue Jumbo Tabs, Nature’s Way Granular Powder or, if your pool is equipped with a Nature² Pro-A-Plus unit, a Nature’s Way Z-Pack. Pools not using Nature² need to maintain a Free Chlorine reading of 1-3 ppm. If your pool is equipped with a Nature² Mineral Sanitizer- you need only maintain a 0.5-1.0 ppm reading. See the Sanitizing Your Pool section for more detailed information.
Now your filter is running, water is balanced and sanitized; you can relax and enjoy your pool. Thank you for entrusting Pool City for your family’s fun.