

How to build a home theater
Want a movie-theater experience in your home? Learn how to build a home theater with step-by-step instructions from the pros at HGTV.com
Home theaters are no longer only an extravagance for the rich and famous. Thanks to more affordable technology, many families are enjoying a true movie theater experience without leaving home. If you’re thinking about building a home theater, let HGTV walk you through the steps.
Step 1: choose a location
The ideal space for a home theater is 20 feet long by 13 feet wide and relatively isolated from the rest of the house. “It has to be in a place that does not interrupt the business of the home,” says Rob Rickel, president of RSR Custom Renovations and Additions. “You don’t want the sound disturbing everyone.”
Good options include:
- Building a theater wing off the family room
- Closing in the open second-story space above a formal living room
- Converting a spare bedroom that’s at least 12 by 12 feet
Step 2: frame and insulate
Building the shell of a home theater is similar to building any other addition to your home – with one exception. You’ll want to pay special attention to insulation. A rating of R30 is standard for the floor, ceiling, and exterior wall insulation, but don’t neglect the interior walls. Loosely packed R11 can help keep the sound of movie explosions from rocking the rest of your home. It won’t block the noise completely, though. You’ll need to add additional sound barriers after you pre-wire the room.
Step 3: pre-wire surround sound
Most home theaters use a 7.1 surround sound system. This includes one subwoofer and seven channel speakers – left, right, center, two side surrounds, and two rear surrounds. To pre-wire a 7.1 system, follow these steps:
Mark the location where each speaker will go:
- Center – just above or below the viewing screen
- Left/Right – on either side of the screen at ear height
- Side Surrounds – on the side walls just behind the main row of seating
- Rear Surrounds – on the back wall (how far apart depends on the system)
Choose a spot for the hub that will house your receiver and other A/V equipment. The hub can be hidden in a cabinet inside the theater or in a closet nearby.
Run audio cables from the hub to each speaker location. Cables should be at least 16-4 (16 gauge, four conductors) for side and rear speakers. Use stronger 12 or 14-gauge cables for left, right, and center speakers.
Some home theaters now use 9.1 surround sound, says Michael Fox of Cinema Sound. This adds another set of speakers in the front of the room. “If there’s a helicopter flying overhead (in the movie), you’ll hear that sound from those top speakers,” Fox says.
Step 4: pre-wire a video projector
For a realistic, large-screen theater experience, you’ll need to pre-wire a projector system. This involves just two cables:
- An HDMI cable to carry high-definition video to the projector
- A CAT5 control wire for accessing the projector with a radiofrequency (RF) remote.
This will let you start your movies without pointing at the projector.
One end of these cables should extend from the ceiling at the rear of the theater, where the projector will hang. The other end should connect to your equipment hub. Be sure to pre-wire the hub with your cable or satellite feed, as well as high-speed Internet for streaming video.
Step 5: pre-wire lighting
Appropriate lighting is essential for creating a movie theater atmosphere. This includes recessed lighting in the ceiling and sconces along the side walls. Run basic electrical wiring to each of these locations. Connecting the lights to an RF dimmer will let you control them with the same RF remote you use for the projector. You can even set the lights to auto-dim when you press play.
If you plan to have stadium seating, you’ll also need floor lighting along the steps. One option is to pre-wire low-voltage lighting that can be left on all the time.
Step 6: install drywall and sound barriers
When hanging the drywall, make careful incisions through which you’ll route all of your pre-wired electrical and audio cables. At this stage, you’ll have two main options for additional soundproofing:
- Use specialty drywall, such as QuietRock Soundproof Drywall. This is a very effective sound barrier but can cost eight times as much as standard drywall.
- Use ordinary drywall lined with sound-dampening materials, such as high-density vinyl.
- Whichever way you go, be sure to hang a solid-core door for optimum sound reduction.
Step 7: set up video and sound systems
Once your drywall is painted, you can hang your speakers, projector, and screen. In a theater of 20 by 13 feet, the ideal screen size is 110-120 inches. For a professional feel, frame the screen with a proscenium – a set of black acoustic panels that hide the left, right, and center speakers.
Camouflage the remaining speakers with acoustic panels that double as artwork. These panels can be printed with custom designs, including family photos or favorite movie posters.
The speakers and projector will connect to the receiver in your equipment hub. The receiver accepts content from a wide range of multimedia devices, such as:
- Blu-ray player
- Cable/satellite feed
- Game console
- Home theater PC
A good Blu-ray player will do far more than play discs. Through a pay-per-view service like VUDU, you can stream high-definition movies off the Internet whenever you like. Some Blu-ray players also network with your personal computer, making it easy to enjoy photos, music, and home videos in your theater.
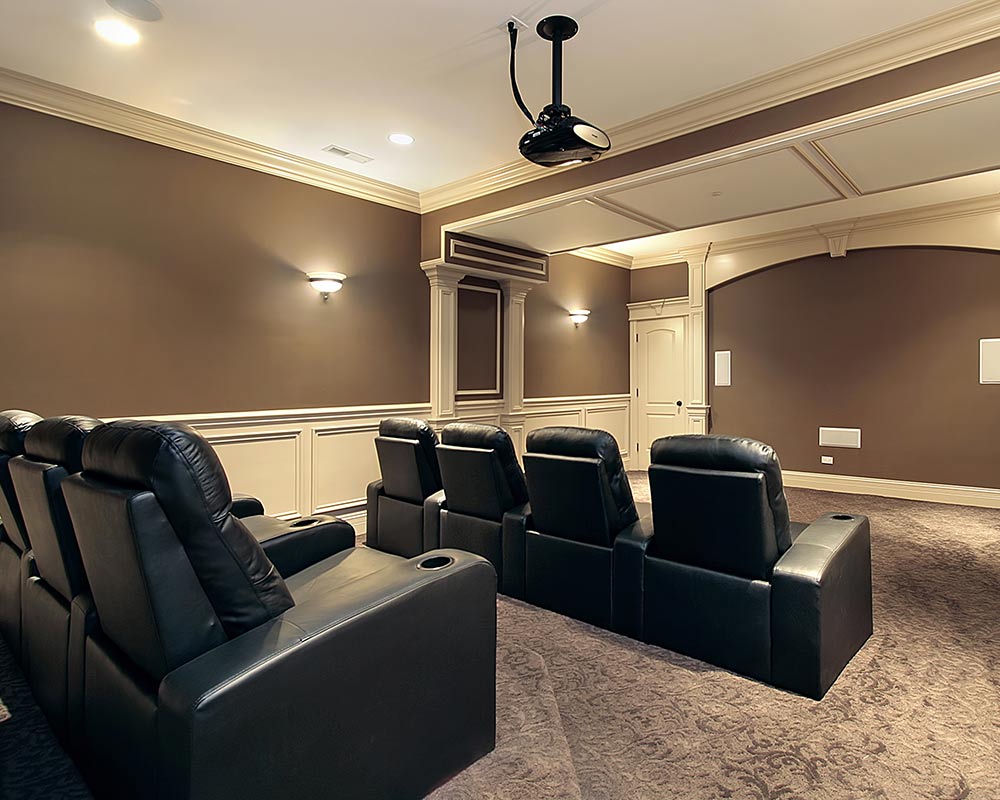
Step 8: install theater-style seating
You can furnish your theater with comfy sofas and loveseats. But for the real deal, you’ll want to install authentic theater-style seating. Two rows of four seats will fit comfortably in a 20 by 13 theater. For better viewing, elevate the back row with a pre-built platform.
Theater seating comes in a wide range of styles, including genuine leather with cup holders in the armrests. These are the kind of seats that beckon you to sit back, relax, and enjoy the feature presentation!